To launch a new instance from AMI, following the given steps:
Login to your AWS console, and select EC2 from the Services dropdown (present at top left corner of the page).
Note: AMI user or role should have permissions to setup an instance.

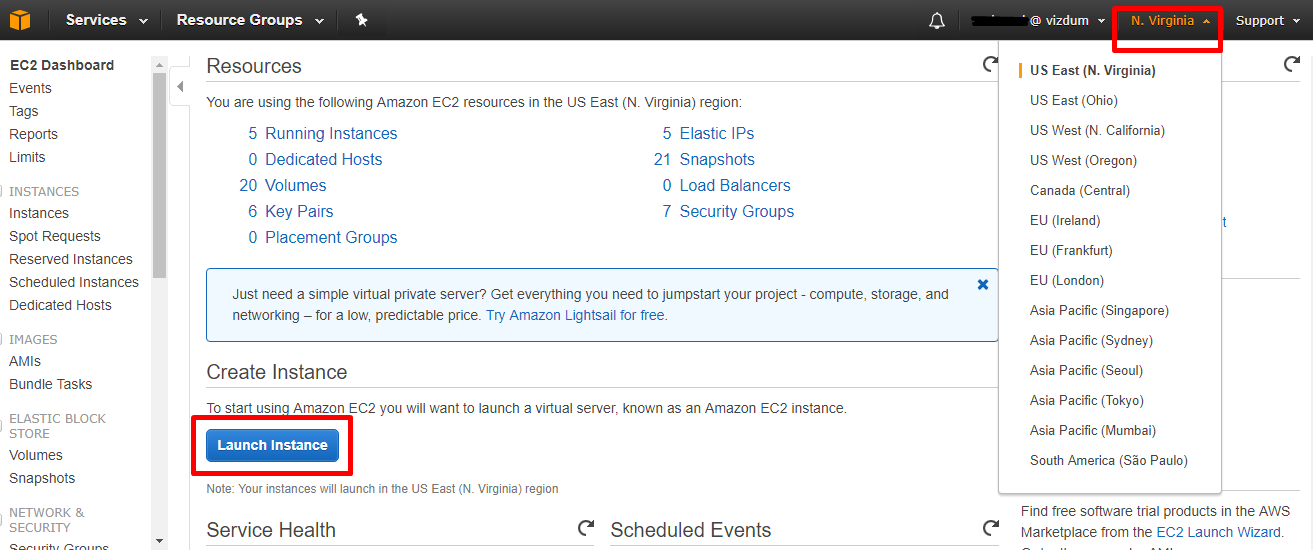
You will be taken to a page which contains your current usage information and a button Launch Instance under the heading Create Instance. To launch a new instance, select an appropriate region from top right corner and click the Launch Instance button.
Select My AMIs tab from the left navigation panel. Check Shared with Me checkbox under the Ownership tab and you will be able to see our provided AMIs.

4. Select our provided AMI “Vizdum Self Hosted Snapshot” by clicking on the Select button next to it.

Select your desired Instance Type from the given list.
Note: The most suitable AMI Instance type is already selected by default and is the recommended (minimum requirement) for the end users, but if as a user you require extensive performance from Vizdum then you can select t2 small or t2 medium as per your requirements.

Please note that steps 3 to 5 are optional. These are self-explanatory steps and if you are familiar with the settings, you can make the necessary changes according to your requirements. Otherwise you can jump directly to Step 6 ’Configure Security Group’

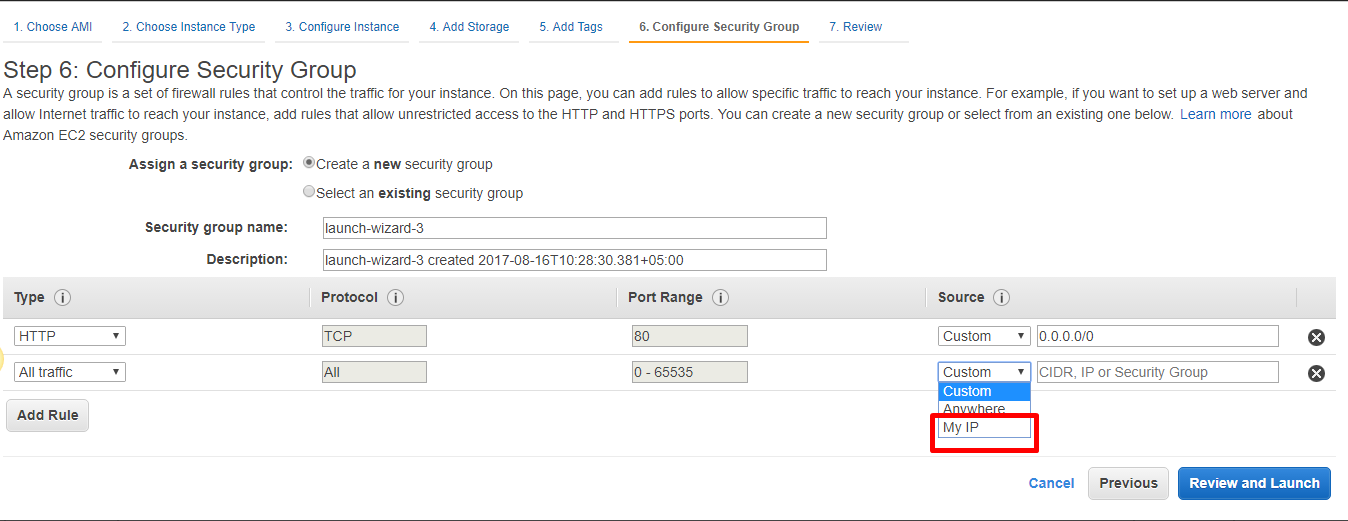
Note: Step 6 ‘Configure Security Group’ is an important option which is related with the security of your instance. If you have an existing configured group, select it, otherwise create a new group with the following 2 rules:
a. Allow http traffic for all IPs
b. Allow every protocol and every port to your specified IP or Range of IPs
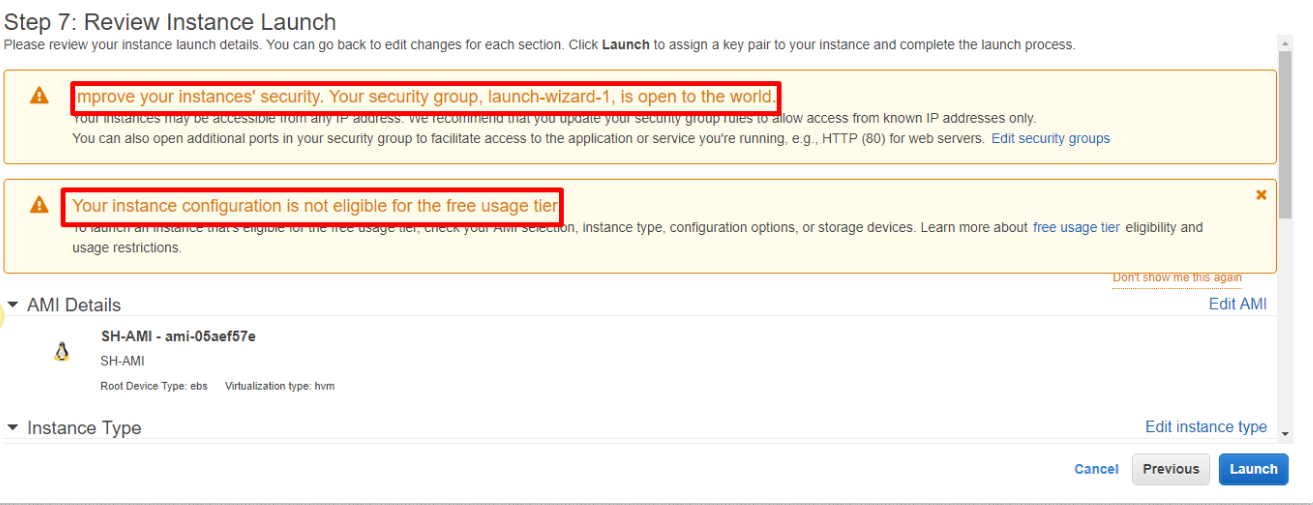
In the last step, review your settings and click Launch to launch your new instance.
Note: Please ignore the warnings on this screen
After you have clicked Launch, you will be offered the options of: selecting an existing Key Pair, creating a new Key Pair or proceeding without a Key Pair. If you have an existing ‘key pair’ and you can either select it from the dropdown menu given under ‘Select a key pair’ or proceed without creating a Key Pair by accessing your instance with a username and password only. However, it is recommended that you either use an existing Key Pair or create a new one.
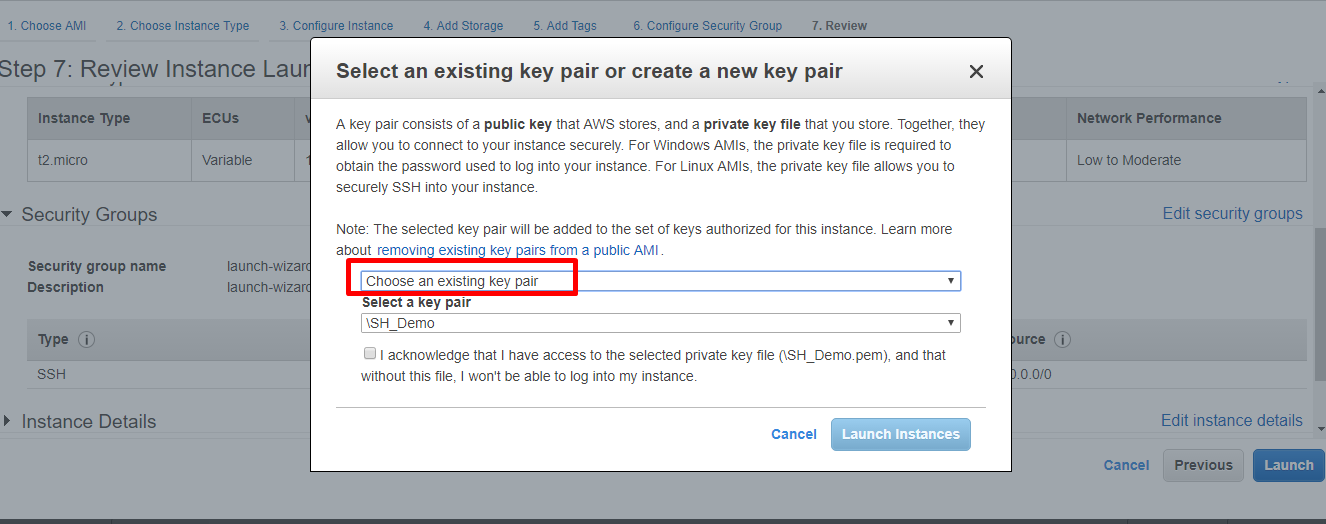
To create a new ‘Key Pair’: Select the option, enter the key pair name, download the file and store it at a secure and accessible location for future use. You will not be able to download the file again once it has been created.
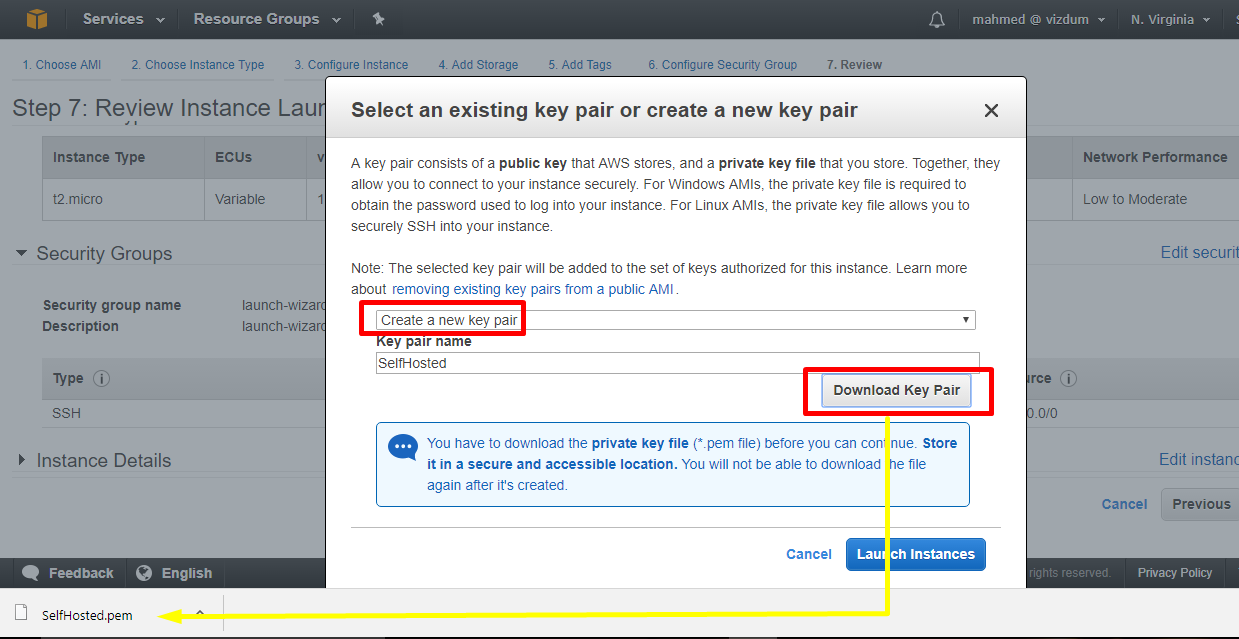
After you are satisfied with the key pair you have selected or created, click the Launch Instances button.
Note: If you forget to download the key pair file then you will be required to redo the entire step.
Your Instance will be launched and available within few minutes. You can access it via Public DNS or Public IP (mentioned in the figure below).
Note: After this step, kindly follow the instructions given in the section OTHER VIZDUM CONFIGURATION (given near the end of the page)
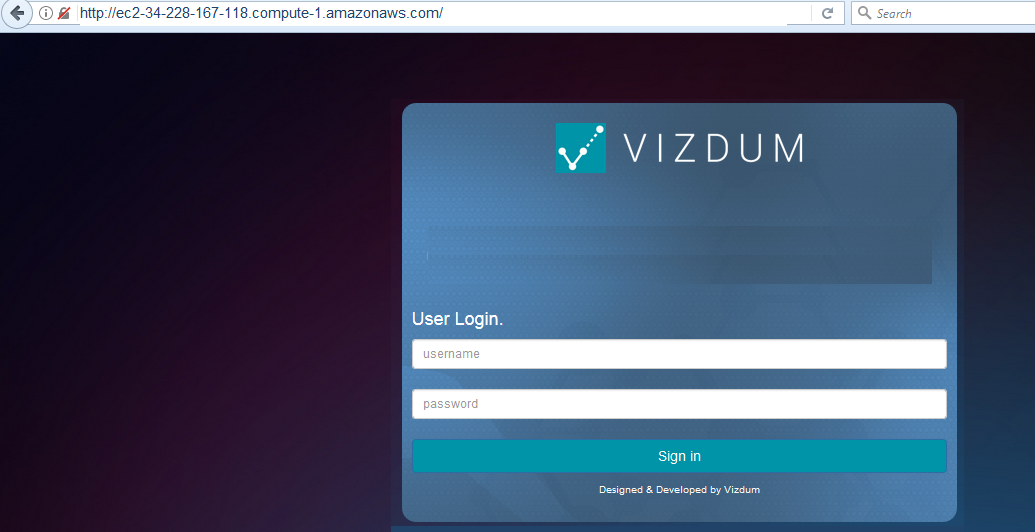
Once you have completed the given steps, you should able to access the screen at "http://{Public DNS or IP of your Instance}/" URL.

Provide your User Login “admin_selfhosted” and Password “VxcB@#1234Xdb” and click on the Sign in button to login. This is the default username and password of your account but you can easily change the password by going to the ‘My Profile’ section on your Vizdum dashboard.
You will be presented with a blank dashboard after logging in.
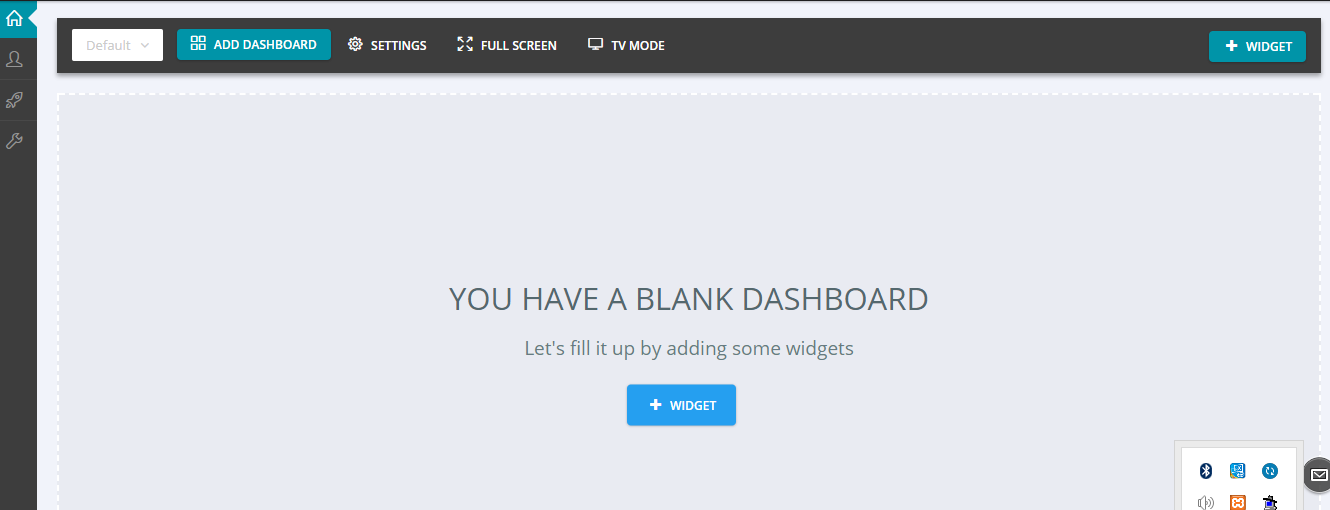
Note: Before using this dashboard, you will need to change the configuration setting according to the steps mentioned below so your application is ready for dashboard and widget creation. Creating and configuring the above given services are mandatory before using the Vizdum dashboard app.
AWS Queuing Services
For the creation of AWS Queuing Services:
Select ‘Simple Queue Service’ from the Services drop down menu (present at top left corner of your AWS Console)

If you have don’t have any saved queues then you will be presented with the following screen. To Create a New Queue click the Get Started button.

Provide a Queue Name and select Standard Queue (selected by default) then click the Quick Start button.


Created queues will be displayed on the screen (shown below).

If you already have any previously saved queues, you will be presented with the above screen directly.
Next, press Create New Queue button and provide a name and region for your Queue.
Select a Standard Queue option and then click Create Quick Start button. You can also click the configured queue button to change the default parameters.
After queue creation you will be redirected to the SQS Console where you can select the newly created queue and copy its URL, which will be used later.

For acquiring AWS_ACCESS_KEY_ID and AWS_SECRET_ACCESS_KEY credentials, which will be used for your DynamoDb data storage, please follow the steps provided at: http://docs.aws.amazon.com/amazondynamodb/latest/developerguide/SettingUp.DynamoWebService.html#SettingUp.DynamoWebService.GetCredentials
NOTE: After you have completed the installation of AMI you will get the URL from AWS. You can now also point this URL to a registered domain name as well. Next you will be required to send your AWS URL for approval from the self-hosted dashboard as shown in the image below.

How to Create a New User
To create a new user:
a. Go to IAM console. Once opened, click on the Users tab given in the right navigation panel
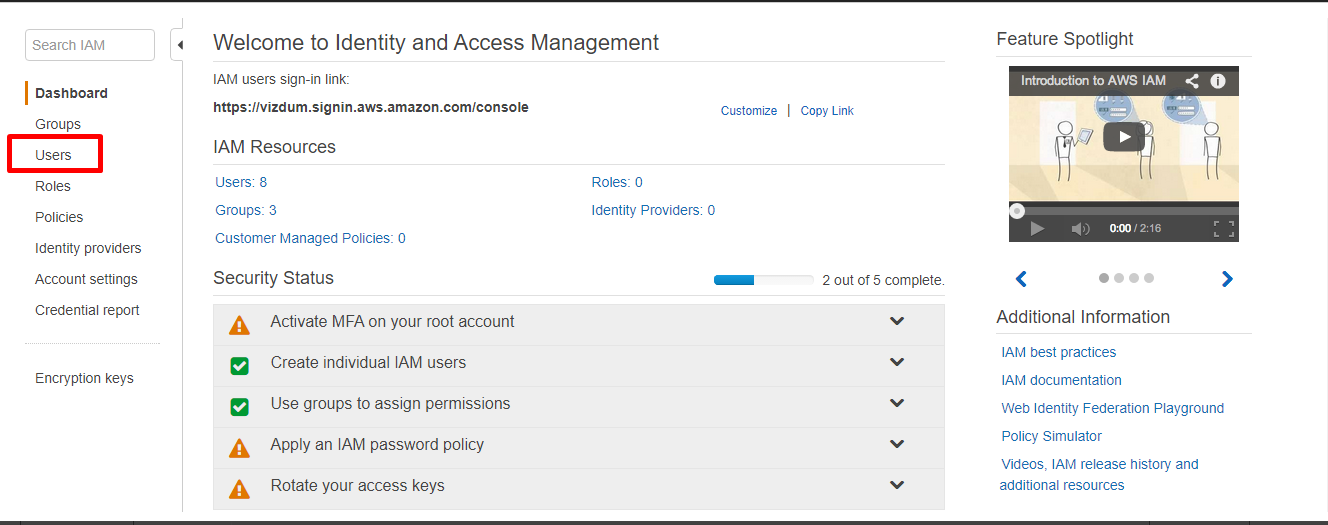
b. Click on the Add user button

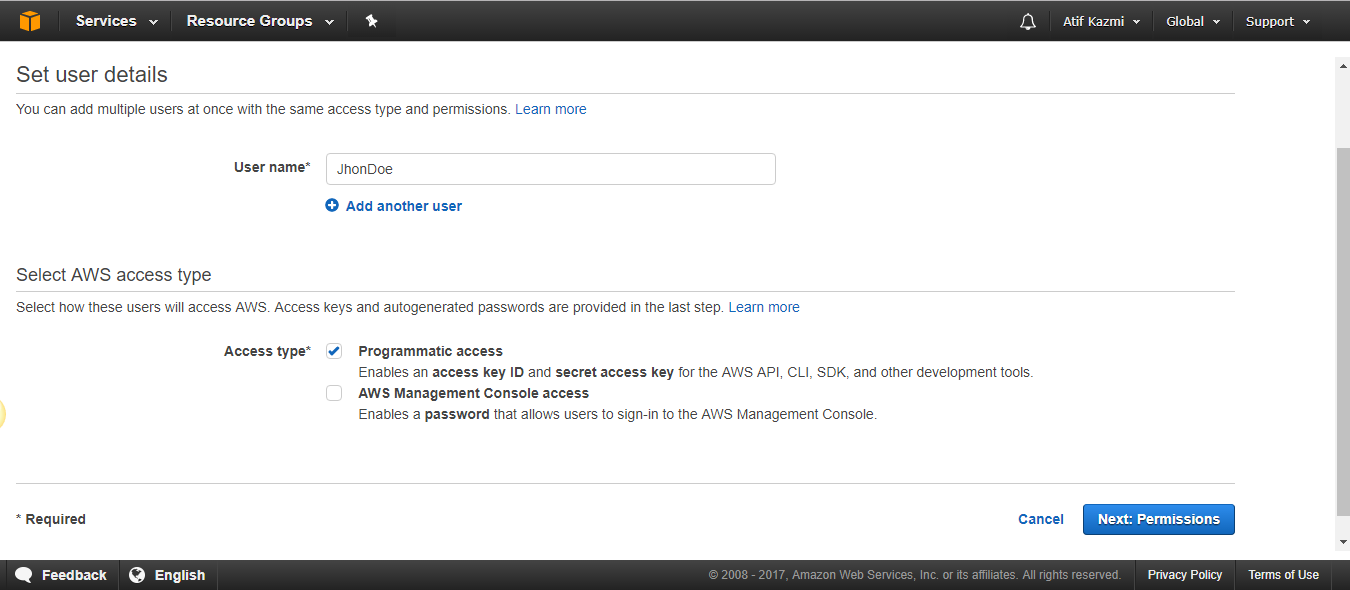
c. Add a Username, check the Programmatic access checkbox and click the Next: Permissions button to proceed.
d. Next, select Attach existing policies directly tab and select AmazonDBfullaceess permission and click the Next: Review button

You can review the settings from this screen and then click the Create User button.

Other Vizdum Configurations
Here are a few more configurations you will require in order to use the Vizdum dashboard smoothly:
SSH your EC2 Linux instance using Putty or any other SSH tool. Please find a comprehensive tutorial for this on the following link: http://docs.aws.amazon.com/AWSEC2/latest/UserGuide/putty.html
Login with ubuntu. Once you are connected, go to the Vizdum API directory by typing the “cd /var/www/vizdum-self-hosted/vizdum_api” command.
Type “sudo vim .env” and press Enter to open the VIM editor.
Press the Insert button on your keyboard to enable the edit mode inside the editor.
-
Provide values for each of the following required labels:
APP_BASE_URL=http://{Public DNS or IP of your Instance}/vizdum_api/public
API_BASE_URL= http://{Public DNS or IP of your Instance}/vizdum_api/public
APP_CDN_URL= http://{Public DNS or IP of your Instance}/vizdum_api/public
DATA_PUSH_URL= http://{Public DNS or IP of your Instance}:3000
AUTH_URL=http:// {Public DNS or IP of your Instance} /dashboard/popup.html
AWS_ACCESS_KEY_ID={You will get this b following DynamoDb tutorial}
AWS_SECRET_ACCESS_KEY={You will get this b following DynamoDb tutorial}
AWS_REGION={region of our choice i.e: us-east-1}
QUEUE_URL = { You will get this b following SQS tutorial }
MAIL_USERNAME={your gmail id, you want to use i.e: test@gmail.com}
MAIL_PASSWORD={gmail Id’s password}
Press ECS button on your keyboard and type “:x!” to save the changes.
To quit the file without saving the changes, you can press ESC button and type and enter “:q!”.

Note: After following the above mentioned steps, you will be able to use your Vizdum dashboard app. Please be informed that a few service integrations, like Twitter, MailChimp, CSV, and Text widgets, can be used directly while others like Facebook and Google will require separate application registration with your domain. Also, integration for services like Google AdWords will require a secure URL enabled on your domain to communicate.
Email Generation
Please note that for email generation you will require a separate account with some required settings to send emails. Review details for email generation requirements here: https://support.google.com/accounts/answer/6010255?hl=en